Moving out of a rental property? We know it can feel like you’re climbing a mountain of tasks. But don’t worry – we’ve got your back with this ultimate end of tenancy cleaning checklist. Whether you’re a tenant aiming to reclaim your full deposit or a landlord preparing for new occupants, this guide will ensure every nook and cranny sparkles.
Why Is End of Tenancy Cleaning So Crucial?
Before we roll up our sleeves, let’s chat about why this clean-up is such a big deal:
For Tenants:
- It’s your golden ticket to getting that full deposit back.
- Leaves a stellar impression – always handy for future references!
- Ensures you’re fulfilling your end of the rental agreement.
For Landlords:
- A spotless property is much easier to re-let.
- Sets high standards for incoming tenants.
- Maintains the property’s value and condition over time.
Looking to find out how often you should deep clean your rental home? Check out this Deep Cleaning Frequency Guide.
Your Room-by-Room End of Tenancy Cleaning Checklist
Let’s break it down room by room, shall we?
Kitchen Cleanup: Where the Magic (and Mess) Happens
The heart of the home deserves extra love:
- Oven and Hob:
- Scrub the oven interior, including racks and trays.
- Clean the hob, removing any burnt-on food.
- Don’t forget the extractor fan and filter!
- Fridge and Freezer:
- Defrost the freezer completely.
- Clean all shelves, drawers, and interior walls.
- Wipe down the exterior, including the top.
- Dishwasher:
- Run an empty cycle with a dishwasher cleaner.
- Clean the filter and wipe down the interior and exterior.
- Microwave:
- Clean interior and exterior, including the turntable.
- Cupboards and Drawers:
- Empty all contents.
- Wipe down interiors and exteriors, including handles.
- Countertops and Backsplash:
- Thoroughly clean and disinfect all surfaces.
- Pay attention to grout lines and sealants.
- Sink and Taps:
- Descale and polish taps.
- Clean and disinfect the sink, including the drain.
- Floor:
- Sweep and mop, paying attention to corners and under appliances.
Bathroom Brilliance: Sparkling Clean and Germ-Free
Make it shine from top to bottom:
- Toilet:
- Clean thoroughly, including under the rim and around the base.
- Don’t forget the seat, lid, and flush handle!
- Shower and Bathtub:
- Scrub tiles, grout, and remove any mould or mildew.
- Clean and descale shower heads and taps.
- Polish glass screens or scrub shower curtains.
- Sink and Vanity:
- Clean and polish the basin, taps, and surrounding areas.
- Wipe down any storage units or shelves.
- Mirrors and Glass:
- Polish to a streak-free shine.
- Floor:
- Mop thoroughly, paying attention to corners and behind the toilet.
Living Room and Bedrooms: Creating Welcoming Spaces
These areas need a thorough refresh:
- Floors:
- Vacuum carpets thoroughly, considering professional cleaning if required.
- Mop hard floors, including under furniture.
- Walls and Ceilings:
- Dust and clean, removing any cobwebs or marks. If stains or scuffs remain, a fresh coat of paint can restore walls to a like-new finish. House painting Melbourne can help refresh interiors effortlessly.
- Wipe down light switches and sockets.
- Windows and Sills:
- Clean inside and out (if accessible).
- Wipe down windowsills and tracks.
- Curtains and Blinds:
- Vacuum or launder curtains according to care instructions.
- Dust or wipe down blinds.
- Furniture (if provided):
- Vacuum upholstery.
- Polish wooden surfaces.
- Check for and clean any stains.
- Wardrobes and Drawers:
- Empty all contents.
- Wipe down interiors and exteriors.
Don’t Forget the Extras: The Devil’s in the Details
These often-missed areas make a big difference:
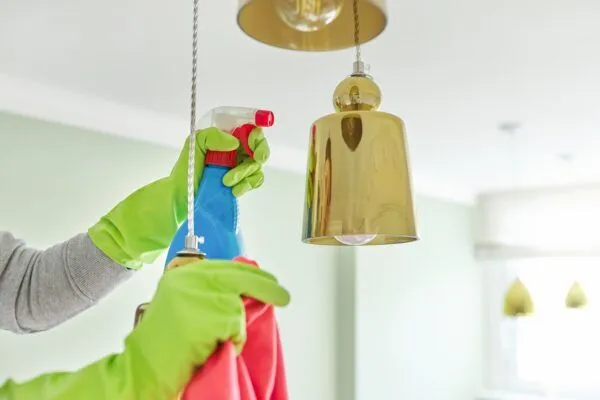
- Light Fittings:
- Dust and clean all light fittings and shades.
- Replace any blown bulbs.
- Radiators and Pipes:
- Wipe down and clean behind radiators.
- Skirting Boards and Door Frames:
- Dust and wipe clean.
- Doors:
- Clean both sides, including handles.
- Rubbish Bins:
- Empty and disinfect all bins.
Outdoor Spaces: First Impressions Count
If applicable to your property:
- Garden:
- Mow the lawn and trim any overgrown plants.
- Remove weeds and tidy flower beds.
- Patio, Decking or Fences:
- Sweep and wash down surfaces.
- Your fencing is a big part of the overall look of your property. Installing durable and stylish options like Colorbond fence panels will give you privacy, security and looks. These low-maintenance panels are designed to withstand all weather conditions so minimal effort is for long-lasting appeal.
- If your outdoor area includes retaining walls, keeping them clean and well-maintained is crucial for both aesthetics and structural integrity. For expert supplies and solutions in Adelaide, visit Retaining Wall Supplies Adelaide.
- External Bins:
- Clean and disinfect.
Top Tips for a Stress-Free End of Tenancy Clean
- Start Early: Don’t leave it all to the last day. Begin packing and cleaning room by room as soon as you can.
- Gather Your Supplies: Stock up on cleaning products and tools before you start. Nothing’s worse than running out of cleaner halfway through!
- Work Top to Bottom: Start with dusting ceilings and light fittings, then work your way down. This prevents re-dirtying cleaned areas.
- Don’t Forget the Details: Things like light switches, door handles, and skirting boards are easily overlooked but make a big difference.
- Document Your Efforts: Take photos of your cleaning progress. It can be helpful if there are any disputes about the cleanliness of the property.
- Check Your Tenancy Agreement: Some agreements have specific cleaning requirements. Make sure you’re meeting all the stipulated conditions.
- Consider Professional Help: If you’re short on time or energy, professional end of tenancy cleaning services can be a lifesaver.
Frequently Asked Questions
Q: How long does an end of tenancy clean usually take? A: It depends on the size and condition of your property, but typically between 4-8 hours for a thorough clean of a standard-sized home.
Q: Do I need to clean the carpets? A: Check your tenancy agreement. Many require professional carpet cleaning at the end of the tenancy, especially if the property was carpeted when you moved in.
Q: What if I don’t clean properly? A: Your landlord may deduct cleaning costs from your deposit or, in extreme cases, dispute your deposit return. It’s always best to do a thorough job to avoid any issues.
Q: Can I use the same cleaning products for all surfaces? A: No, it’s important to use appropriate cleaners for different surfaces. For example, you’ll need specific products for wooden floors versus tile or linoleum.
Q: Should I clean the windows from the outside? A: If you can safely access the outside of the windows, it’s a good idea to clean them. However, don’t put yourself at risk – second-floor windows or higher should be left to professionals.
Ready to Tackle Your End of Tenancy Clean?
Armed with this comprehensive checklist, you’re all set to leave your rental property sparkling clean. Remember, a thorough end of tenancy clean isn’t just about ticking boxes – it’s about leaving on a positive note and setting yourself up for success in your next home.
Need a hand with your end of tenancy clean? At London House Cleaners, we specialise in making properties shine from top to bottom. Our professional team knows exactly what landlords and letting agents look for in a thorough clean. Get in touch today, and let’s make your move-out stress-free and spotless!
Remember, whether you’re doing it yourself or calling in the pros, a proper end of tenancy clean is an investment in your future. It ensures you leave your old home on good terms and start your new chapter on the right foot. Happy cleaning!